
Solving garbage bags with 3D printing
For many years, I’ve had a small, 10l organic waste bin standing on my kitchen counter. It looked nice, but it had some very important luxury issues:
- I could not find any garbage bags that were small enough.
- The too-large, stiffer paper bags were hard to fit in.
- Where I live, you can’t throw those “biodegradable” plastic bags into the organic waste, because they decompose too slowly.
- Those bags are not waterproof, so the bin was always dirty on the inside. I had to clean it all the time, and during that time I didn’t have a bin for my organic waste.
My goal was to get rid of any garbage bags entirely, and to always have a bin available.
The solution: two bins. As soon as one is full, the other one takes over, until the first one is cleaned again.
Alas, I couldn’t find any to buy.
DIY to the rescue.
I had three criteria for my new bins. They had to be:
- dishwasher-safe for easy cleaning
- stackable so as to take up the same space as the old single bin
- 3D printable in one piece
I fired up onshape and got to drawing.
Stackable
The shape is really just a box with rounded corners and a lid on top. To make one bin fit into another, it had to have a narrow bottom and a wider top.
Dishwasher-safe
For the material, I went with PETG instead of PLA (the cheapest, easiest, default 3D printing material), since PLA starts to become flexible at 55-60ºC, and PETG (should) at 80-86ºC - the so-called glass transition temperature.
Well, either I have a particularly powerful dishwasher or I should have calculated with a higher margin:

Deformed bin after a visit at the dishwasher
Switching to ASA (100ºC) solved the problem. ASA is very close to ABS, and that’s what lego bricks are made of, so it is solid.
Printable
My original design featured a band around the top with a horizontal bottom edge - this is not something that can be 3D printed as is, because the edge would have to be floating in the air while being printed.
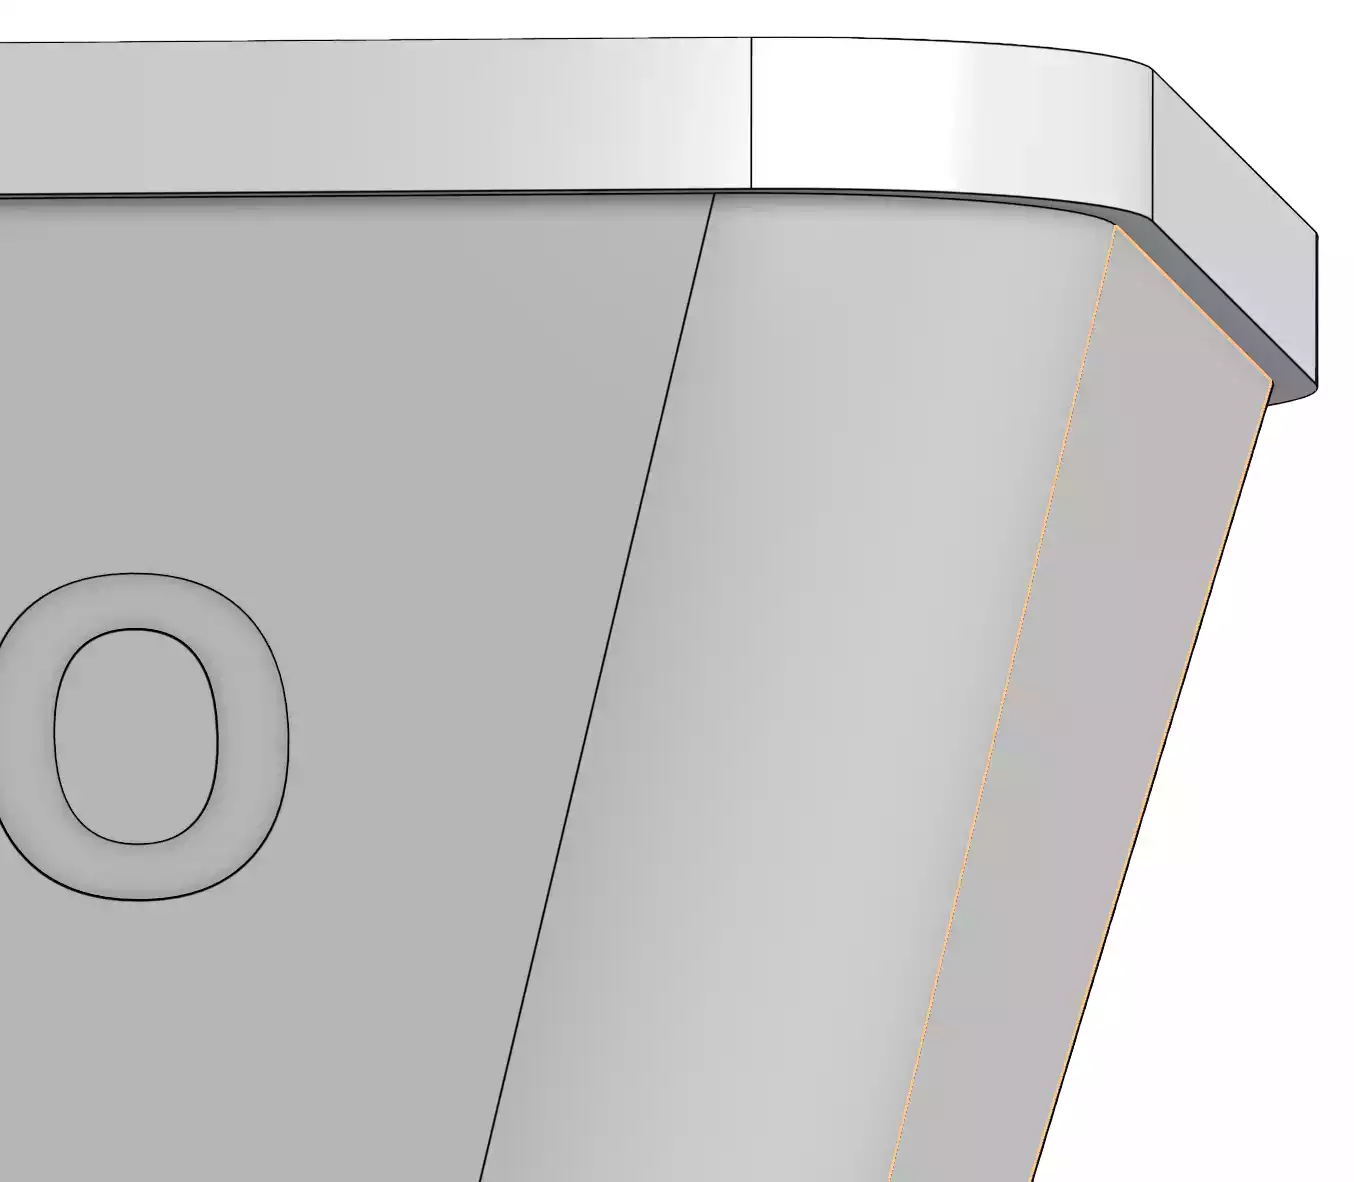
Bin with horizontal edge - to be floating in space.
This meant that quite a substantial support structure was needed to print this - 90g of support material for 320g of material for the actual object.

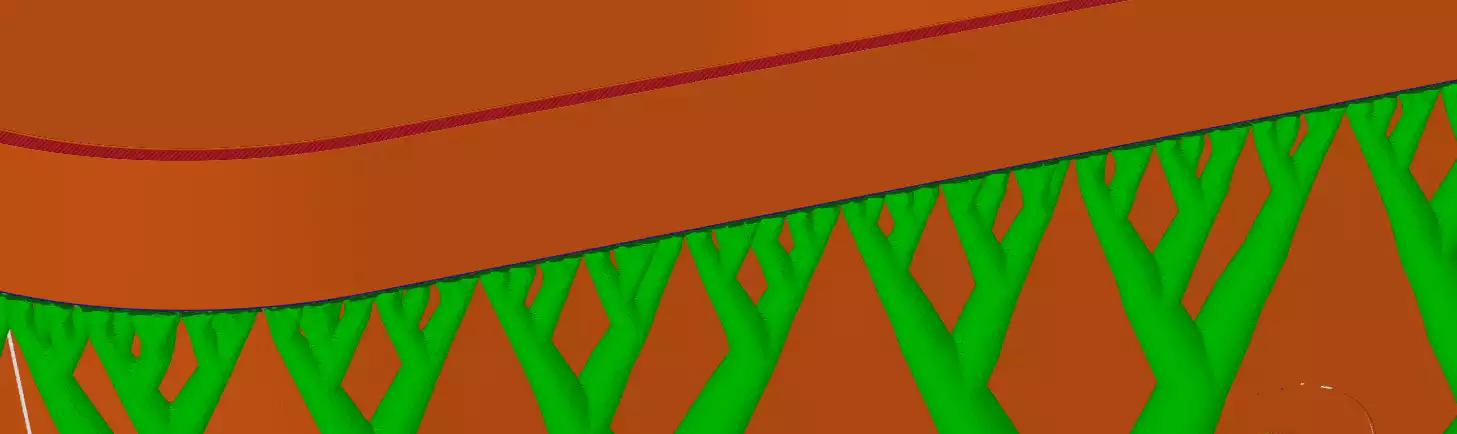
Virtual view of the print plate with tree supports in green
The solution was to change the edge to a 45 degree angle, which can be printed without any support:
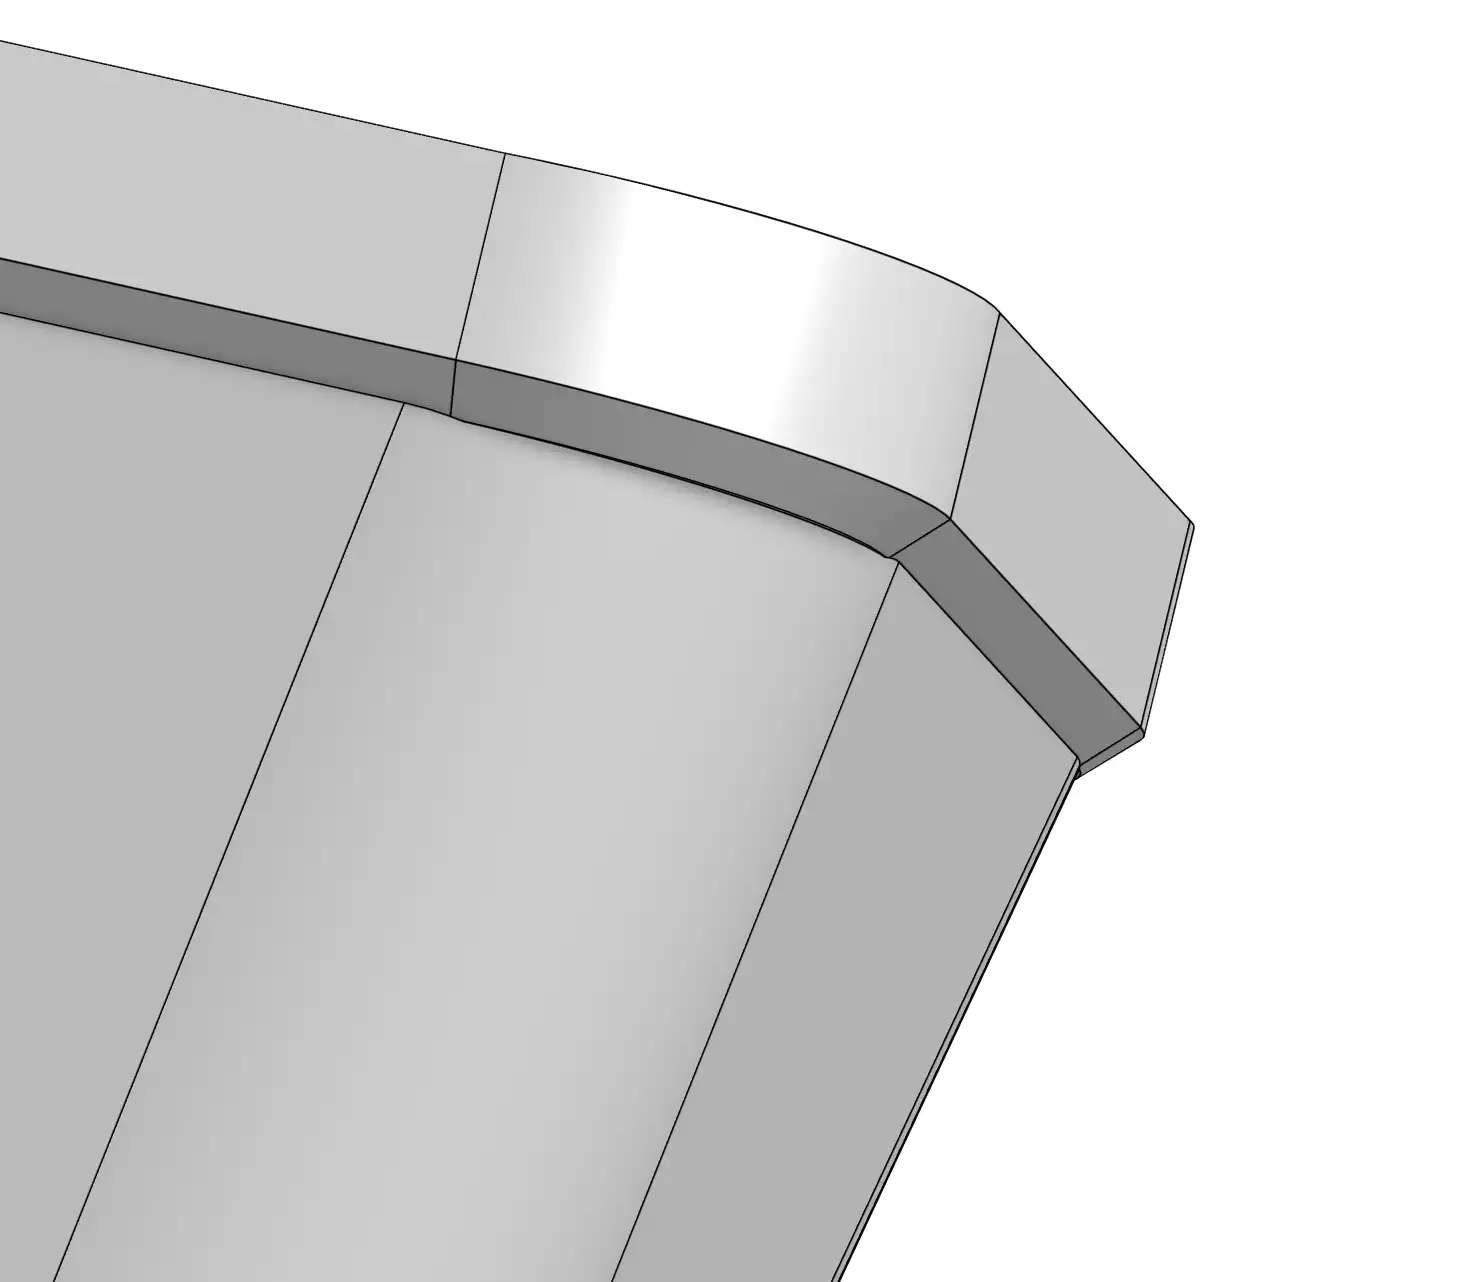
45 degree edges can be printed
Leakage
One unexpected issue that came up with one of my countless (single digit number of) prototypes was that it was leaking liquids.

2 outer walls plus infill
In the default settings, walls are printed using a thin infill sandwiched between two layers of solid plastic.

Solid walls
When I changed this to 6 walls, turning the walls into solid plastic, the problem was fixed.
Conclusion

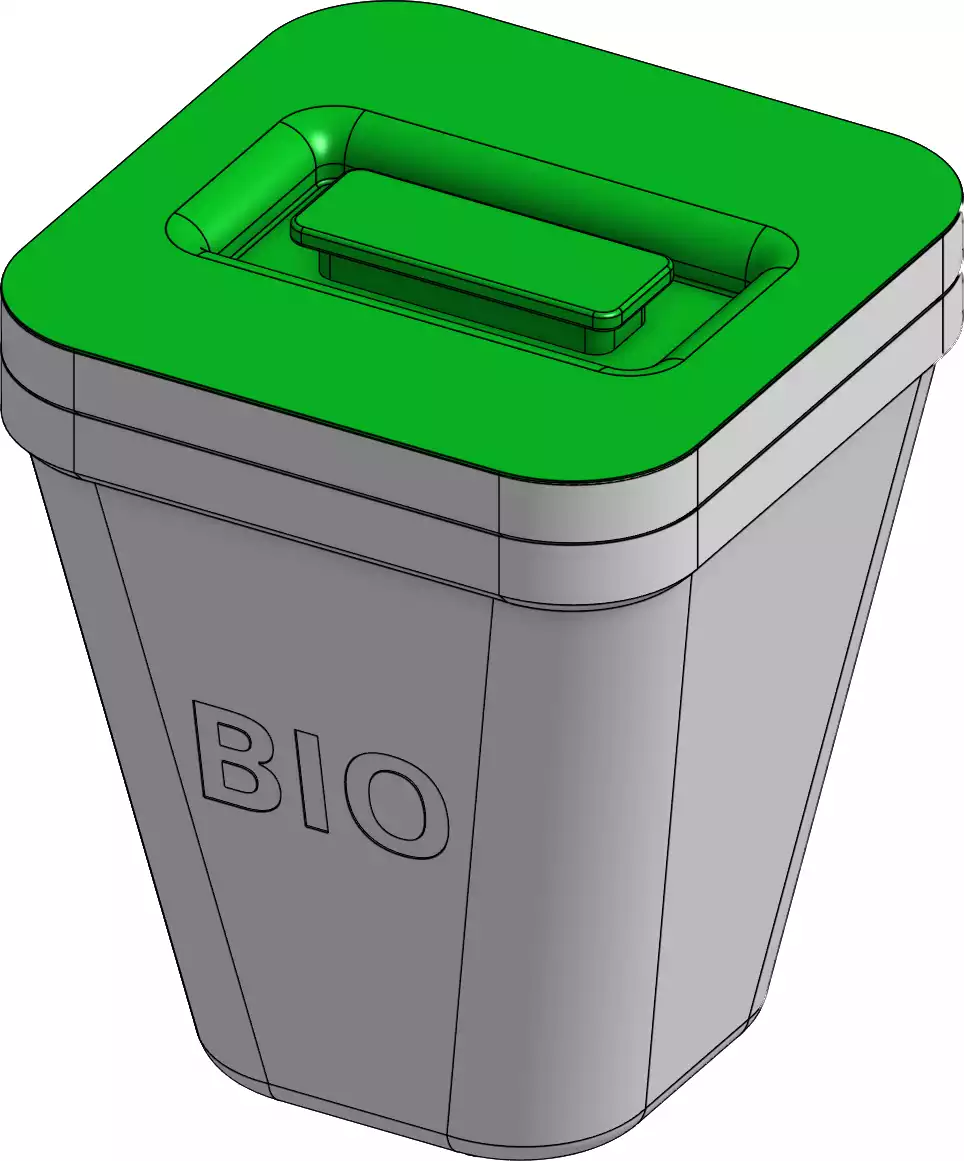
The finished products.
After a few weeks of tinkering and printing, I can now live a slightly happier life, always a waste bin at my disposal, and no more plastic bags (at least for the organic waste).
And so can you - if you have access to a 3D printer. Here are the print files. And the original onshape CAD drawing.
P.S. In a few years, I should have made up for all the printed plastic with the bags I now don’t have to buy anymore. 😬
Comments